

Firebase Push Notification Message with JavaScript
Introduction to Firebase

Let's Start
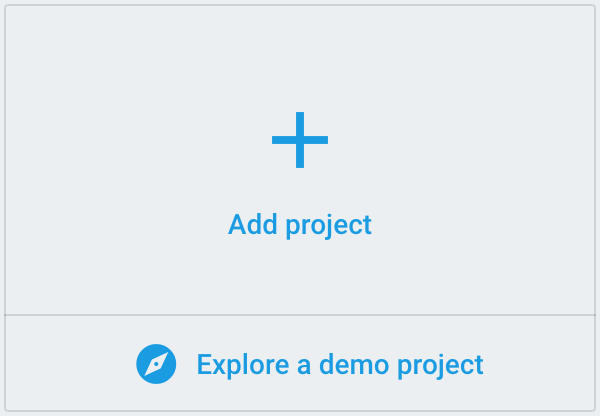
Add Project button similar to this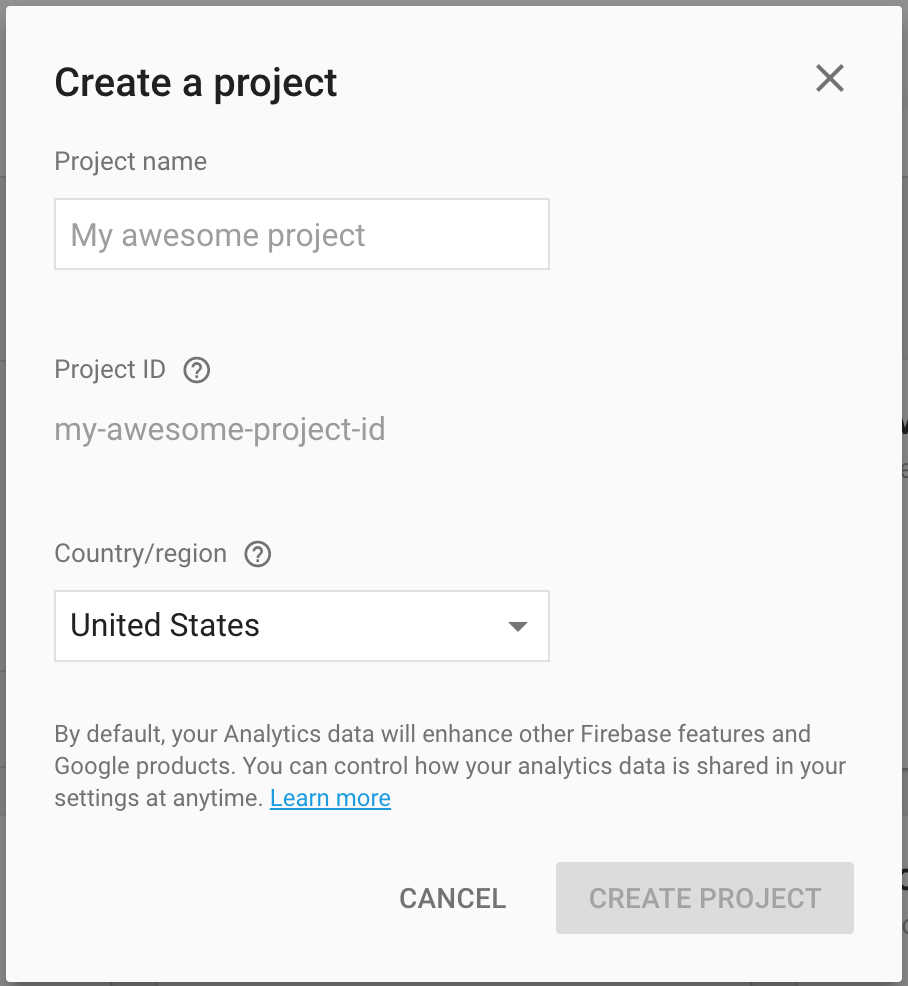
Create Projectwhen App creation is Done, firebase console will redirect you to App management section.
By Using our app URL, we will develop our app at front end and use the API to do the CRUD operations. here we are using JavaScript to access Firebase Real Time Database,To enable Firebase in our JavaScript/Web App use Steps shown in the Below pictures:
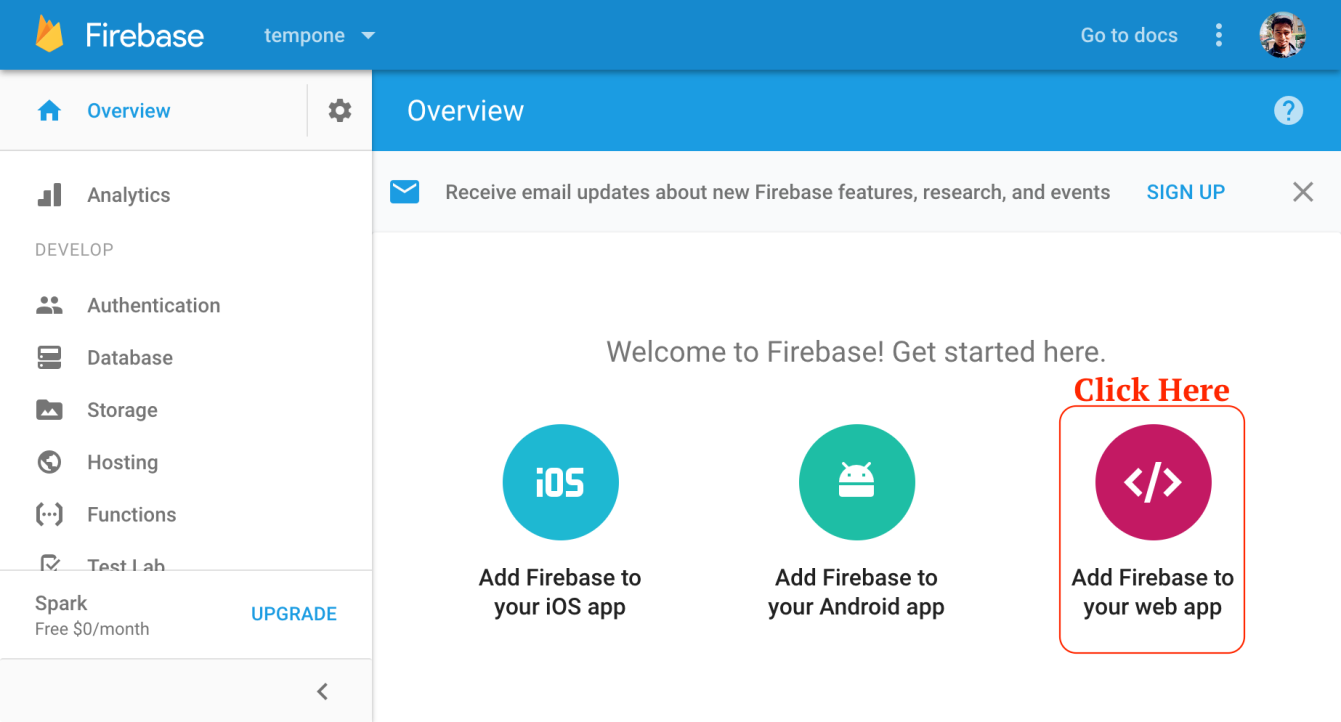
Add Firebase to your Web App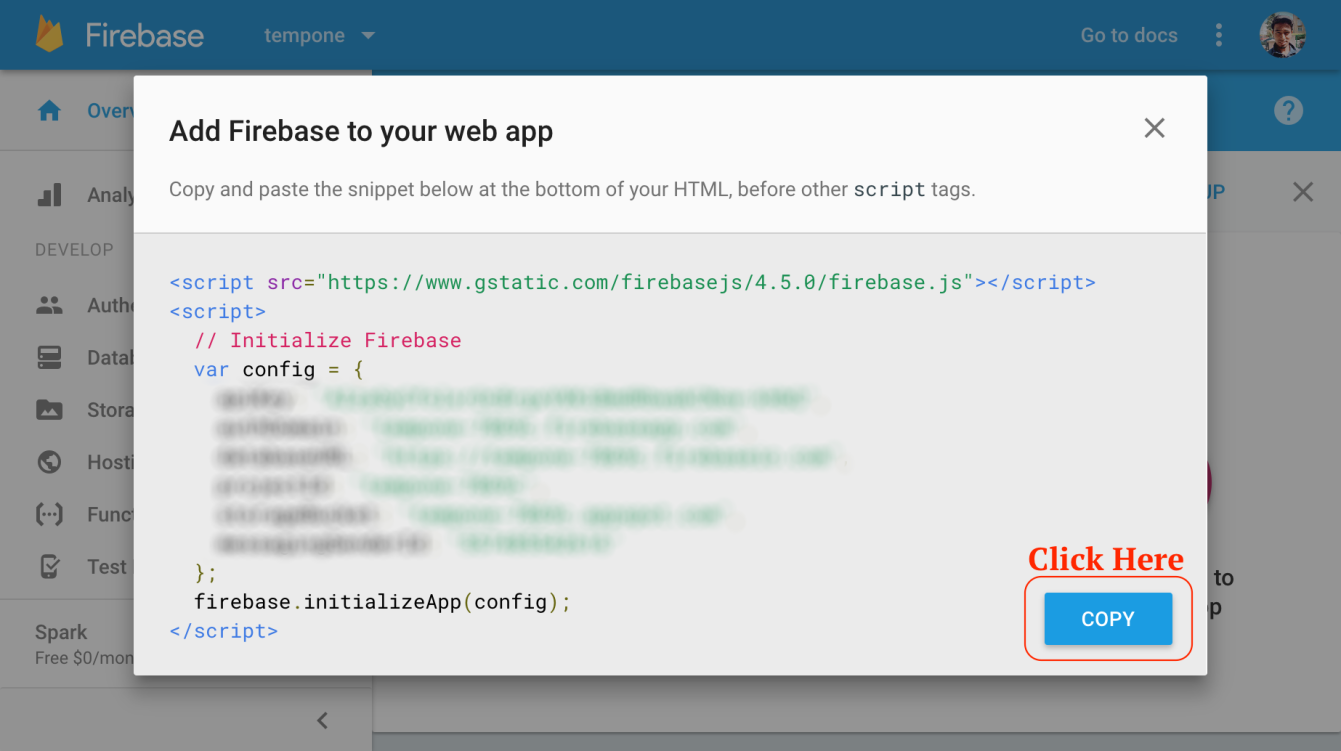
Copy to copy the configAbove copied code can be pasted in the HTML file just above the script tag for our bindings file script.js.
Another way can be that we include the necessary firebase script as:
<script src="https://www.gstatic.com/firebasejs/4.5.0/firebase.js"></script>And then initialize the firebase in our script.js like as follows:
// file: script.js
// Initialize Firebase
var config = {
  apiKey: "...",
  authDomain: "...",
  databaseURL: "...",
  projectId: "...",
  storageBucket: "...",
  messagingSenderId: "...."
};
firebase.initializeApp(config);
// ... rest of the code
As our app is initialized, we can create the database reference through which we will be doing our Read and Write operations.
But before proceeding, it always to have a little idea/plan about structure of the data being stored. As the data is stored in the JSON format, lets use the following data organization/structure for our DB:
"contactdb" : {
  "contacts": [{
    "contactId": {
      "name": "Rajan Sharma",
      "email": "test@gmail.com",
      "location": {
        "city": "Chandigarh")
        "state": "Chandigarh",
        "zip": "160047"
      }
    }
  }]
}
As from above format it is clear that out db has child array contacts. This array will hold the contact objects as a key value pair of contactId and contactObject. contactId is a hash generated by Firebase. Hashed are used to prevent the concurrent access and overlapped data writing.
Actual object will look like this:
{
  "contacts" : {
    "-jK45Fbk1Gpb1dLW9G23" : {
      "email" : "abc@time2hack.com",
      "location" : {
        "city" : "Chandigarh",
        "state" : "Chandigarh",
        "zip" : "160047"
      },
      "name" : "Rajan Sharma"
    },
    "-Jl9cQXgm_6YkdC1xgCK" : {
      "email" : "abc@pankaj.pro",
      "location" : {
        "city" : "Chandigarh",
        "state" : "Chandigarh",
        "zip" : "160047"
      },
      "name" : "Rajan Sharma"
    }
  }
}
Let's come back to the app design. For the basic things we must be able to add and view data.
Firstly we will see how to add data. As we have already created the reference to our db; we can now create a reference to the child array contacts by the ref() method. To get the new reference of child object, following is the code:
var dbRef = firebase.database();
var contactsRef = dbRef.ref('contacts');
Now as we have the reference to the child array contacts; we can push (as the object is an array) the contact object to add into this array by following code:
contactsRef.push({
  name: 'Rajan Sharma',
  email: 'test@gmail.com',
  location: {
    city: 'Chandigarh',
    state: 'Chandigarh',
    zip: '160047'
  }
});
And the contact gets added to the Firebase App. Now there is a trigger to an event of child_added which will get the newly added child.
As we are working with the collection contacts we are having events child_added, child_removed and child_changed. child_moved event is also there but available only when working with the ordered data.
value event can be used for addition and changes in the data but will provide everything. So in case of collection value callbacks can take longer time to execute because of large dataset received. But for collection, can be used for first load of app.
For viewing or reading of all contacts, following code can be used. But to loop over the contacts collection we need to work with the Firebase collection iterator forEach. Following code will demonstrate this:
contactsRef.on("child_added", function(snap) {
  console.log(snap.val())
  snap.forEach(function(childSnapshot) {
    var key = childSnapshot.key();
    var childData = childSnapshot.val();
  });
});
So with above code we completed the C(Create) and R(Read) of the CRUD operations of our application.
Now for U(Update) and D(Delete) we can use .set() and .remove() methods. While updating data, we would need to traverse to particular key child object and then use set method, the set method accepts new updated object to be set as new value. And after traversal if you wanna delete that node/key, you can use the .remove(). Following is the example code for adding, updating and then removing a rogue/improper value.
contactsRef.push({
  "email" : "examplemail@gmail.com",
  "location" : {
    "city" : "Chandigarh",
    "state" : "Chandigarh",
    "zip" : "160047"
  },
  "name" : "Rajan Sharma"
})
contactsRef.on("child_added", function(snap) {
  //set the new value after 10 seconds
  setTimeout(function () {
    contactsRef.child(snap.key()).set({
      "email" : "example11gemail@gmail.com",
      "location" : {
        "city" : "Palwal",
        "state" : "Haryana",
        "zip" : "123224"
      },
      "name" : "Rajan Sharma"
    });
  }, 10*1000);

  //delete the object after 20 seconds
  setTimeout(function () {
    contactsRef.child(snap.key()).remove();
  }, 20*1000 );
});
So till now we went through all CRUD operations with our Firebase Data. Let’s put all bricks together to shape our contacts store application. To build a quick and easy UI.
<!DOCTYPE html>
<html lang="en">
<head>
  <meta charset="utf-8">
  <meta http-equiv="X-UA-Compatible" content="IE=edge">
  <meta name="viewport" content="width=device-width, initial-scale=1">
  <title>Time to Hack: Firebase with JavaScript and jQuery</title>
  <link rel="stylesheet" href="//maxcdn.bootstrapcdn.com/bootstrap/3.3.4/css/bootstrap.min.css">
  <style type="text/css"> #contacts p, #contacts p.lead{ margin: 0; } </style>
</head>
<body>
  <div class="container">
    <h1>Contact Store Application</h1>
    <hr/>
    <div class="row">
      <div class="col-md-6">
        <form method="post" name="contactForm">
          <div class="form-group">
            <label for="name">Name</label>
            <input type="text" class="form-control" id="name" required placeholder="Enter name">
          </div>
          <div class="form-group">
            <label for="email">Email</label>
            <input type="email" class="form-control" id="email" required placeholder="Enter Email">
          </div>
          <h3>Location</h3>
          <div class="form-group">
            <label for="city">City</label>
            <input type="text" class="form-control" id="city" placeholder="Enter City">
          </div>
          <div class="form-group">
            <label for="email">State</label>
            <input type="text" class="form-control" id="state" placeholder="Enter State">
          </div>
          <div class="form-group">
            <label for="zip">Zip</label>
            <input type="text" class="form-control" id="zip" placeholder="Enter Zip Code">
          </div>
          <button type="submit" class="btn btn-primary addValue">Submit</button>
        </form>
      </div>
      <div class="col-md-6">
        <ul id="contacts" class="list-group">
          <!-- Contact Object li.list-group-item.contact will be added here by js -->
        </ul>
      </div>
    </div>
  </div>

  <!-- jQuery (necessary for Bootstrap's JavaScript plugins) and Bootstrap -->
  <script src="//ajax.googleapis.com/ajax/libs/jquery/1.11.2/jquery.min.js"></script>
  <script src="//maxcdn.bootstrapcdn.com/bootstrap/3.3.4/js/bootstrap.min.js"></script>
  <!-- Include Firebase Library and Config-->
  <script src="//www.gstatic.com/firebasejs/4.5.0/firebase.js"></script>
  <!-- Contacts Store JavaScript -->
  <script src="script.js"></script>
</body>
</html>
And the script that will have all functionality of our app is as follows:
// file: script.js
// Initialize Firebase
var config = {
  apiKey: "BY2dtHCfolbhOcBujhVXKKJUBRbwakCNsw-mRSR",
  authDomain: "test-39c.firebaseapp.com",
  databaseURL: "https://test-39c.firebaseio.com",
  projectId: "test-399c",
  storageBucket: "test-399c.appspot.com",
  messagingSenderId: "342385542567"
};
firebase.initializeApp(config);

//create firebase database reference
var dbRef = firebase.database();
var contactsRef = dbRef.ref('contacts');

//load older conatcts as well as any newly added one...
contactsRef.on("child_added", function(snap) {
  console.log("added", snap.key(), snap.val());
  document.querySelector('#contacts')
    .innerHTML += contactHtmlFromObject(snap.val());
});

//save contact
document.querySelector('.addValue')
  .addEventListener("click", function( event ) {
    event.preventDefault();
    if( document.querySelector('#name').value != ''
          || document.querySelector('#email').value != '' ){
      contactsRef.push({
        name: document.querySelector('#name').value,
        email: document.querySelector('#email').value,
        location: {
          city: document.querySelector('#city').value,
          state: document.querySelector('#state').value,
          zip: document.querySelector('#zip').value
        }
      });
      contactForm.reset();
    } else {
      alert(' name or email  is required');
    }
  }, false);

//prepare conatct object's HTML
function contactHtmlFromObject(contact){
  console.log( contact );
  var html = '';
  html += '<li class="list-group-item contact">';
    html += '<div>';
      html += '<p class="lead">'+contact.name+'</p>';
      html += '<p>'+contact.email+'</p>';
      html += '<p><small title="'+contact.location.zip+'">'
                + contact.location.city + ', '
                + contact.location.state + '</small></p>';
    html += '</div>';
  html += '</li>';
  return html;
}
And following script is same as above, but has jQuery code instead of plain JavaScript:
// file: script.js
// Initialize Firebase
var config = {
  apiKey: "AIzaSyCfolxrOcBrgxVXKiBmdRbwakCNsw-kHbQ",
  authDomain: "test-39c.firebaseapp.com",
  databaseURL: "https://test-39c.firebaseio.com",
  projectId: "test-7869c",
  storageBucket: "test-39c.appspot.com",
  messagingSenderId: "2345485544567"
};
firebase.initializeApp(config);

//create firebase database reference
var dbRef = firebase.database();
var contactsRef = dbRef.ref('contacts');

//load older conatcts as well as any newly added one...
contactsRef.on("child_added", function(snap) {
  console.log("added", snap.key(), snap.val());
  $('#contacts').append(contactHtmlFromObject(snap.val()));
});

//save contact
$('.addValue').on("click", function( event ) {
    event.preventDefault();
    if( $('#name').val() != '' || $('#email').val() != '' ){
      contactsRef.push({
        name: $('#name').val(),
        email: $('#email').val(),
        location: {
          city: $('#city').val(),
          state: $('#state').val(),
          zip: $('#zip').val()
        }
      })
      contactForm.reset();
    } else {
      alert(' Name or email is required');
    }
  });

//prepare conatct object's HTML
function contactHtmlFromObject(contact){
  console.log( contact );
  var html = '';
  html += '<li class="list-group-item contact">';
    html += '<div>';
      html += '<p class="lead">'+contact.name+'</p>';
      html += '<p>'+contact.email+'</p>';
      html += '<p><small title="'+contact.location.zip+'">'
                + contact.location.city + ', '
                + contact.location.state + '</small></p>';
    html += '</div>';
  html += '</li>';
  return html;
}


No comments:
Post a Comment